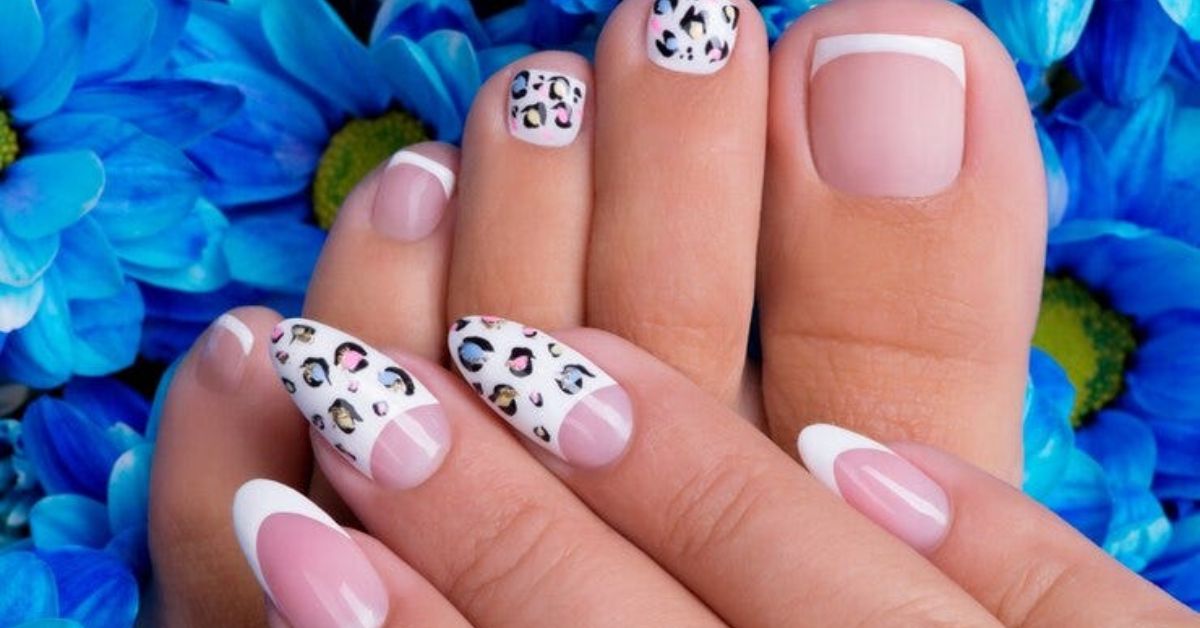
While searching for a perfect manicure, one often underestimates the power of a good nail buffer. While salons offer professional services, achieving salon-worthy nails at home is not as elusive. With the right techniques and tools, you can transform your nails from lackluster to lustrous. This detailed guide will lead you through the process of perfecting the buff with the assistance of top-notch buffers.
1. Grasping the Fundamentals
Nail buffers are designed to smooth out ridges, remove stains, and create a polished surface for your nail polish. They come in various grits, each serving a specific purpose. Coarse buffers are ideal for shaping, while finer grits add the finishing touch for a glossy shine. Hence, choosing the right one and understanding its nuances will ensure that your at-home manicure matches the results of professional salons.
2. Selecting the Right Buffer
The success of your at-home manicure lies in choosing the right buffer for your nail. On the different platforms, you’ll find an array of buffers, each catering to different needs. Opt for one with a variety of grits, ensuring versatility for various stages of your manicure. A quality one will have a durable surface, allowing for multiple uses without losing effectiveness. Exploring the options on the different platforms guarantees access to tools that enhance your care routine.
3. Prepping Your Nails
Start by making sure your nails are both clean and dry. Remove any existing polish and trim them to your desired length. Gently shape the edges using a file before moving on to the main process.
4. Buffing Step-by-Step
a. Shaping with Coarse Grit
Start with the coarsest side of the buffer to shape your nails. Move it in one direction, avoiding back-and-forth motions, as this can weaken the fingernail. Focus on achieving the desired shape, whether square, oval, or almond.
b. Smoothing with Medium Grit
Transition to the medium-grit side of the buffer to smooth out any rough edges. This step helps eliminate any imperfections left by the coarse grit, leaving your fingernails uniform and ready for the next stage.
c. Polishing with Fine Grit
Now, switch to the fine-grit side for the polishing phase. This step imparts a subtle shine to your fingernails, creating a smooth canvas for the application of polish. The fine grit also helps to minimize any remaining ridges for a flawless finish.
5. Achieving a High-Gloss Shine
To add a touch of sophistication, contemplate utilizing a premium buffer alongside a buffing cream or oil. Apply a small amount to the fine-grit side and gently buff your fingernails in circular motions. This step enhances the natural shine, giving them a glossy, salon-worthy appearance.
6. Maintenance Tips
To prolong the effects of your at-home manicure, follow these maintenance tips:
– Steer clear of abrasive chemicals that may compromise the strength of your nails.
– Moisturise your cuticles regularly to prevent dryness.
– Use a base coat before applying a polish to protect your nails.
7. The Finishing Touch
Complete your at-home manicure by applying the polish color of your choice. The smooth surface achieved through the buffer ensures an even and professional-looking application. This final step enhances the aesthetic appeal and showcases the meticulous care and attention you’ve invested in mastering the buff for salon-worthy output in the comfort of your own space.
Conclusion
Mastering the buff is not just about the tools; it’s a step-by-step process that requires attention to detail. With the right nail buffer and proper technique, achieving salon-worthy output at home is well within your reach. Visit different online platforms to explore a range of high-quality nail buffers that elevate your at-home manicure experience. Embrace the art of buffing, and watch your nails transform into glossy works of art.
You May Also Like: Why a Quality Women’s Wallet Is a Lifelong Investment